Appendix C: Creating a ClojureScript Project
At some point you will want to leave the confines of this book’s active code snippets and write a ClojureScript project. This appendix (to be written) shows you how.
There are two major tools used to create and build projects: Leiningen and Boot. In this appendix, we will use Leiningen.
To install Leiningen, go to its website and download and install it per the instructions.
To create a new project with Leiningen, you use a command in the form
lein new template projectname
where template is the name of a project template and projectname is the name of the project you want to build. The project we will use in this case is the figwheel project, which creates projects that let you build and test your code in a highly interactive manner. Start with a project named it-works, as follows:
lein new figwheel it-works
The last output from this command says:
Change into your 'it-works' directory and run 'lein figwheel'
Wait for it to finish compiling
Then open 'http://localhost:3449/index.html' in your browser
We’ll come back and do that later, but first, look at the directory structure that the template created:
it-works
├── dev
│   └── user.clj
├── project.clj
├── README.md
├── resources
│   └── public
│       ├── css
│       │   └── style.css
│       └── index.html
└── src
    └── it_works
        └── core.cljs
Since figwheel presumes you are building a web application, it has created a the resources/public directory that holds the web page resources. Your code is in the file src/it_works/core.cljs. Notice that the project name (it-works) has a hyphen, but due to the way that ClojureScript works, the directory name has changed the hyphen to an underscore (it_works).
Here are the contents of the core.cljs file:
 1  (ns it-works.core
 2    (:require ))
 3
 4  (enable-console-print!)
 5
 6  (println "This text is printed from src/it-works/core.cljs...")
 7
 8  ;; define your app data so that it doesn't get over-written on reload
 9
10  (defonce app-state (atom {:text "Hello world!"}))
11
12  (defn on-js-reload []
13    ;; optionally touch your app-state to force rerendering depending on
14    ;; your application
15    ;; (swap! app-state update-in [:__figwheel_counter] inc)
16  )
- Lines 1-2
- Establish a namespace, a way of grouping variable and function names so that you can use other people’s code without fear of name collisions. The
:requirelets you add names of ClojureScript libraries that are needed for this program to run - Line 4
- This lets the
printlnfunction print to JavaScript’s console—a must for debugging. - Line 6
- This will now show up in the JavaScript console. The text has been shortened here for space considerations.
- Lines 10-16
- Don’t ask! :) This is fairly advanced stuff, which we may (or may not) cover in other parts of the book.
OK, now run lein fighweel. (If you are on Linux, you will want to type rlwrap lein figwheel to enable the arrow keys in the REPL, which we will discuss later.) The first time you do this, Leiningen will download a whole lot of files that are required for figwheel. Once that is complete, fire up your browser and go to http://localhost:3449/index.html as instructed. Open the developer console, and you will see something like this:
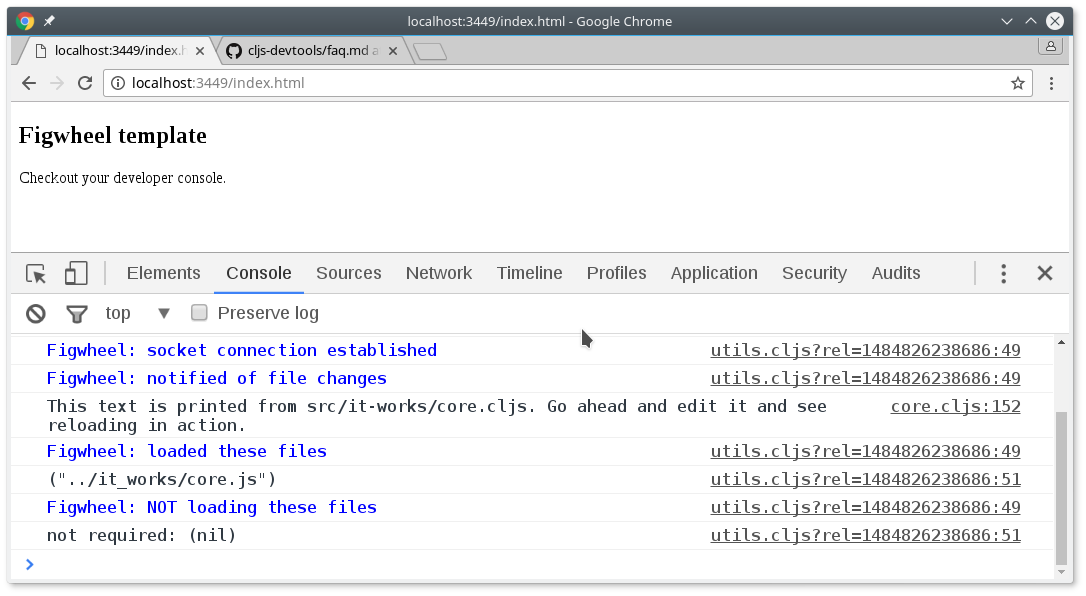
Console output
You can see the text that was in the (println). Now, go into the text editor of your choice, and change the (println) to read as follows:
(println "Look! It works!")
When you save the file, figwheel will automatically recompile the program and reload it in the browser. Notice that the text in the console has changed:
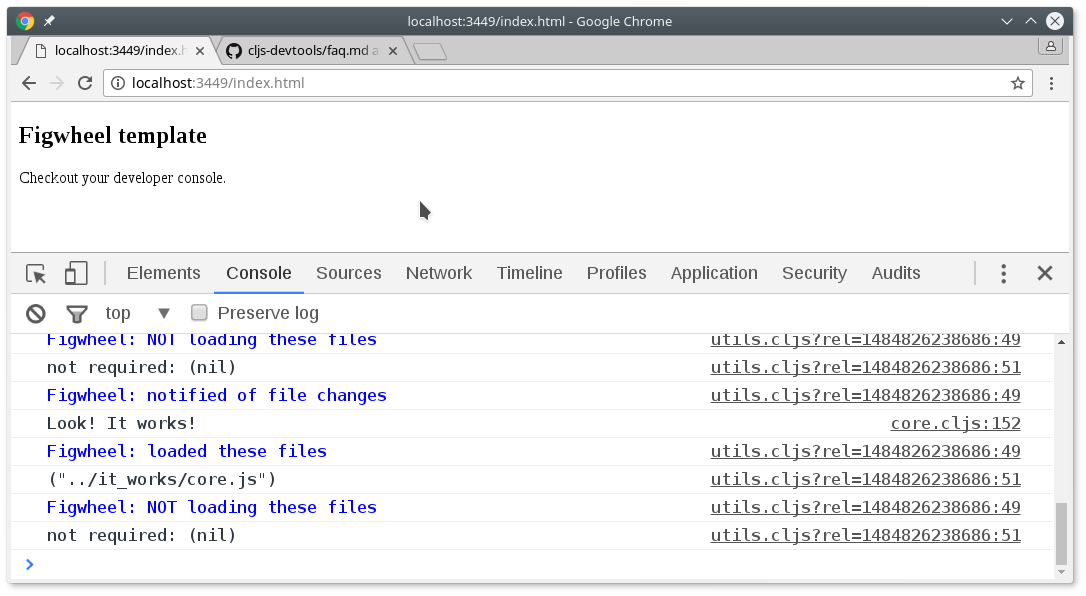
Updated output
Now, make an error on purpose. Change the line to read:
(println "This won't work so well."))
Then save the file. You will see the error “Unmatched delimiter )” in the browser:
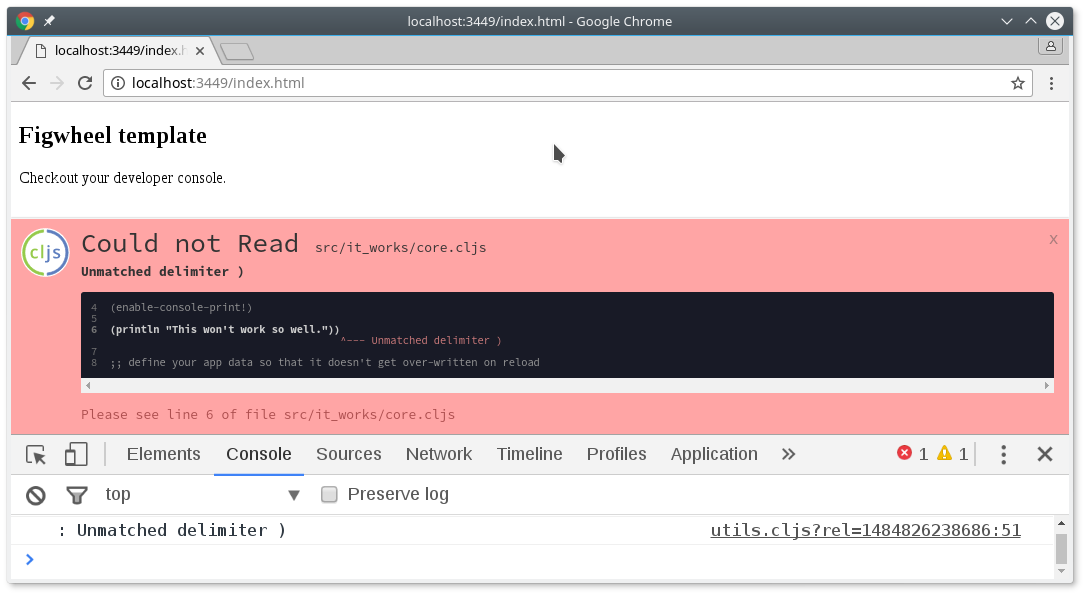
An error display in the browser
Once you correct the error and save, figwheel compiles the program, and you will see the Clojure logo appear briefly in the lower left corner of the browser window, indicating a successful compilation.
Before leaving this topic, bring up the terminal window where you started the lein figwheel command. You will see a lot of text, ending with this:
Prompt will show when Figwheel connects to your application
To quit, type: :cljs/quit
cljs.user=>
This is the ClojureScript REPL. REPL stands for “Read, Evaluate, Print, Loop”, and it is a way to interactively enter and test ClojureScript. The REPL will read your input, evaluate it, print the result, and then loop back to get more input. Try entering some expressions:
(+ 3 5)
(* 7 9)
Now add a definition to your core.cljs file and save:
(defn cube [n] (* n n n))
If you try to use it in the REPL, you will get an error:
cljs.user=> (cube 12)
----  Compiler Warning on   <cljs form>   line:1  column:2  ----

Use of undeclared Var cljs.user/cube

1  (cube 12)
    ^---

----  Compiler Warning  ----
#object[TypeError TypeError: Cannot read property 'call' of undefined]
nil
Notice the cljs.user at the prompt? That says you are in the default namespace, and that is why you get the error—the cube function is in the it-works namespace. You have to swtich to the desired namespace by typing these commands:
cljs.user=> (require 'it-works.core)
nil
cljs.user=> (in-ns 'it-works.core)
nil
it-works.core=> (cube 12)
1728
it-works.core=>
The (require 'it-works.core) loads in the module, and (in-ns 'it-works.core) switches you to that namespace. You can see that it worked because the prompt changed to it-works.core, and once that occurred, you can now use any of the things you have defined in that namespace, which includes the cube function.
Note
You might have noticed that there is an opening quote mark but not a closing one in the preceding commands. This is not an error. This is ClojureScript’s way of defining a symbol, which is what require and in-ns expect as arguments.
Once you are finished experimenting with the REPL or using figwheel, type :cljs/quit in the REPL to return to the command prompt.